How Much Do Ceiling Fans Cost To Run?
Planning to install a new ceiling fan, but worried about the electricity bill? Here’s everything you need to know about the running cost of ceiling fans.
Read MoreLearn how to install a ceiling fan with our comprehensive step-by-step guide. Ensure a safe and efficient installation process while enjoying the benefits of a comfortable and stylish home environment

Do you want to stay cool and reduce your energy bills? Maybe your existing ceiling fan needs replacing.
Then installing a ceiling fan is an excellent idea; it gives some relief when the room cools and maintains good airflow. Plus, ceiling fans are a lot cheaper than installing air conditioning units. So, if you have already bought one for yourself and want to avoid shelling out extra cash to install it, we’re here to help.
We have curated a step-by-step guide with all the essential information for installing a ceiling fan. So, without further ado, let’s get into the details of the new ceiling fan installation!

Consider a few things before getting to work on installing a ceiling fan. So, do look into the following factors:
First, you must get the right tools to install the ceiling fan safely and conveniently. Here’s what you’ll need:
Once all the tools are in place, we’ll have to determine if the fan fits the ceiling space and dimensions and if you are working with a sloped ceiling. Both these factors are crucial because if the size isn’t right or there is a slope, it can threaten your safety.
Hold the two-foot level below the roof and measure the vertical distance between them using a measuring tape. Now, divide that figure by two to determine the drop per foot of the horizontal run. You can judge the blade diameter and required download length using this measurement.
To stay safe, ensure your fan blades are at least seven feet above the floor. Most fans are about a foot in length, which perfectly suits an eight-foot ceiling and offers enough clearance.
A downrod, also known as a down tube or extension tube, is essential for sloped ceilings. It lowers the motor to prevent the blades from striking the ceiling.
It is better to leave space between the fan and ceiling, as the fan will draw in more air, improving air circulation. Also, the blades will be closer to you to feel more air.
Most of the fans come with a short download made for standard ceilings. So, if your ceiling is lower, you’ll have to flush-mount the fan directly, removing the downrod altogether.
After considering all the abovementioned factors, you can start installing your ceiling fan. Here’s a step-by-step guide on the ceiling fan installation process. However, please always consult a licensed electrician before beginning this project and remember to read the manufacturer’s instructions.
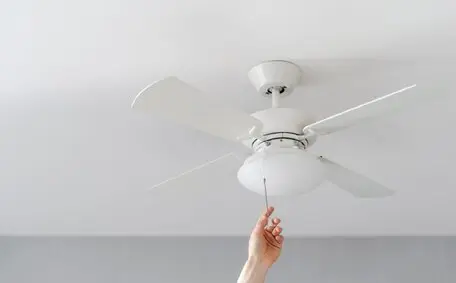
To start the installation, turn off the power supply from the main control panel of the house and pull out the light fixture.
Then, use a hammer and a wooden block to free the existing electrical ceiling box from the framing, pulling the cable out of the ceiling hole. Since this cable is also attached to the new electrical box, be careful while tugging it.
If you can conveniently remove the old fan junction from the ceiling cavity, take it out. But if you can’t, leave it, as you can use the same one again, provided it’s working.
After removing the fixture, check the current in the wires using a voltage tester to ensure they are switched off. Here’s one tip: loosen or bend back the cable clamps before knocking out the box to pull out the cable.
Fit the brace into the ceiling cavity, place the flat edge of the two-foot level on the ceiling and cover the hole. If your roof is thicker than half an inch, rotate the level and position the rod according to the depth of the box.
After positioning it, rotate the shaft to secure the brace to the frame and snap down the saddle on the shaft to keep it centred over the hole. Doing that will drive the screws into the joints and fit the brace against the ceiling.
Take the new ceiling fan junction box and fit the wire into its cable clamp. Then, clamp the box onto the shaft using a deep-well socket or nut driver after slipping it over the saddle screws.
Don’t forget to corrugate a small loop of the grounding wire around the grounding screw and tighten it.
Position the hanger bracket, so the opening faces the higher side if your roof is sloped. If it is levelled, you can keep the bracket facing straight upwards. Screw it into the junction box with the screws that come with the fan brace.
Pull the fan wiring into the box, mount it on the fan brace, and attach the bracket.
After picking the right-sized download, position the motor with the right side facing upwards and thread its wire through the rod. Once satisfied with the assembly, insert the rod into the collar.
To fasten it, pass the rod pin through the tube and collar, secure it using a cotter pin, and tighten the locknuts.
Put the collar and the canopy on the downrod and slide the ball over it. Then, pass the pin through the holes and lift the ball to put the screws into place.
Lower the assembly by lifting it above the open side of the bracket hanger. You’ll have to rotate the motor till the ball slot locks with the tab present on the bracket.
There are a few things that you should know about the wire colours for connecting the fan. The junction box bare ground wire should be connected to the green wire of the bracket hanger using a wire connector. And join the white motor wire to the neutral box wire.
Finally, connect the black and blue motor wires to the black hot wire in the box, folding them together carefully. Electrical wiring carries serious risks and should be managed only by a licensed electrician.
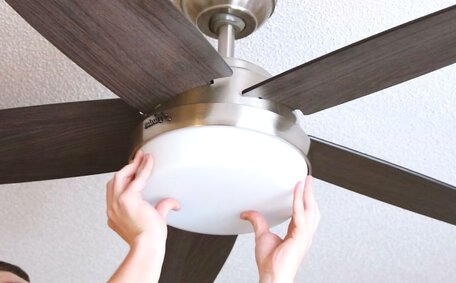
The last step of the fan installation is attaching the ceiling fan blades by screwing them into the brackets connected to the motor. You can use a screwdriver to tighten the fan blades while holding them close to the motor.

Ceiling fans offer a bunch of benefits. Here’s what to look forward to:
Energy Efficient:Ceiling fans can reduce energy costs by lessening the need for air conditioning in summer and heating in winter.
Improved Air Quality: They circulate warm air, helping to clear dust and allergens for fresher indoor air.
Comfort: Offering a gentle breeze, ceiling fans make hot days or stuffy rooms more bearable.
Style: Available in many designs, ceiling fans can complement and enhance any room’s décor.
Versatility: You can install them in almost any room, from bedrooms to kitchens.
Are you thinking about installing a ceiling fan? Make sure to thoroughly research to select the right size, style, and features for your needs. Enjoy the energy efficiency, improved air quality, and enhanced style it adds to your home.
Hiring an electrician helps prevent damage to your home’s infrastructure. Electricians have the experience to mount the fan securely without causing unnecessary harm to your ceiling, walls, or existing wiring or light fixtures. A professional can also help you install a single wall switch or replace your existing wall switch.
Professionals can evaluate your electrical system’s capacity and make any necessary changes to prevent future problems. If any complications arise during installation, electricians can efficiently troubleshoot and ensure your ceiling fan works smoothly without disruptions.
Hiring a professional electrician often includes warranty coverage for their work, providing peace of mind in case any post-installation issues arise. Reputable electricians also carry insurance, offering additional protection against accidental damage or injuries during the installation.
Ultimately, hiring a professional electrician saves you time and stress. Armed with the right expertise and equipment, they complete the job efficiently so you can relish your new fan’s benefits immediately.
Installing a new ceiling fan or replacing your current one can be challenging. But it is worth it when you consider the cost of air conditioning.
Please always consult a qualified and licensed electrician before doing this. Touching your existing wiring can be extremely dangerous and fatal if you don’t do it correctly. So don’t hesitate to contact our team for assistance with ceiling fan installation service in Sydney.
With years of experience, our Sydney electricians are here to help you pick the best fan type, location, and size. Contact us today, and let our professionals handle the installation for you!
However, you can always seek professional help if you feel underskilled.
We’ll sign off on that note! For more excellent ceiling fan tips, check out our article on handling a wobbly ceiling fan!
Did you enjoy reading our article “How To Install Ceiling Fans”? We have many related articles you may also be interested in reading, like the below:
Planning to install a new ceiling fan, but worried about the electricity bill? Here’s everything you need to know about the running cost of ceiling fans.
Read MoreThis guide helps you pick the right ceiling fan size for effective room cooling. Small fans under 106 centimetres circulate air well in rooms up to 100 sqft. Medium or large fans over 52 inches are preferable for larger rooms over 144 sqft or those with high ceilings. Properly matching fan size to your room dimensions optimises airflow and comfortable cooling.
Read MoreGet your ceiling fan ready for summer to stay cool without cranking up the AC. This article provides tips on cleaning your fan blades and housing, adjusting the fan speed setting, and ensuring proper airflow to maximise the cooling effect. Learn how to inspect your ceiling fan and make simple adjustments to optimise cooling performance as the temperatures rise.
Read MoreWe will call back as soon as possible.